Graphing a circle on a TI 84 calculator is a straightforward process that can be completed in a few simple steps. Circles are defined by their center point and radius, so these values must be known in order to graph the circle.

Step 1: Enter the center point
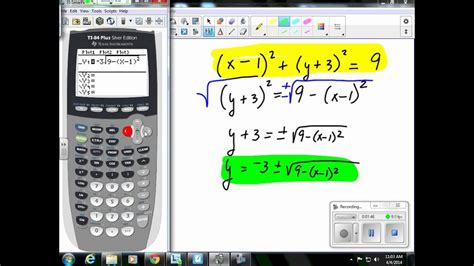
The first step is to enter the coordinates of the circle’s center point. To do this, press the “Y=” key and enter the following expression:
(x - h)^2 + (y - k)^2 = r^2
where (h, k) are the coordinates of the center point and r is the radius of the circle.
Step 2: Enter the radius
Once the center point has been entered, the radius of the circle must be entered. To do this, press the “ALPHA” key and then press the “X,T,Θ,n” key. This will bring up the “radius” menu. Enter the value of the radius and press the “ENTER” key.
Step 3: Graph the circle
Once the center point and radius have been entered, the circle can be graphed by pressing the “GRAPH” key. The circle will be displayed on the screen.
Tips and Tricks
Here are a few tips and tricks for graphing circles on a TI 84 calculator:
- To graph a circle with a radius of 1, simply enter the following expression:
(x - h)^2 + (y - k)^2 = 1
- To graph a circle that is centered at the origin, simply enter the following expression:
x^2 + y^2 = r^2
- To change the color of the circle, press the “2nd” key and then press the “FORMAT” key. This will bring up the “Format” menu. Use the arrow keys to select the “Color” option and then press the “ENTER” key. Select the desired color and press the “ENTER” key.
Conclusion
Graphing circles on a TI 84 calculator is a simple process that can be completed in a few easy steps. By following the steps outlined above, you can quickly and easily graph circles of any size and location.