Your kitchen ceiling plays a pivotal role in shaping the overall ambiance and functionality of your cooking haven. With the right paint choice, you can transform a drab ceiling into a dazzling focal point or create a subtle backdrop that complements your design scheme.

Choosing the Right Kitchen Ceiling Paint
Selecting the perfect kitchen ceiling paint involves considering factors such as:
- Finish: Opt for a paint with a semi-gloss or satin finish, which is easy to clean and reflects light, making the ceiling appear brighter.
- Color: Choose a color that complements your kitchen cabinets, walls, and flooring. White is a timeless choice, while shades of gray, beige, or light blue can create a more contemporary feel.
- Durability: Choose a paint designed for kitchens, which are prone to moisture and grease. Look for paints with mildew-resistant properties and high scrubbability ratings.
Types of Kitchen Ceiling Paint
- Latex Paint: Affordable, easy to apply, and dries quickly.
- Oil-Based Paint: More durable and resistant to stains, but emits a strong odor and takes longer to dry.
- Enamel Paint: A semi-gloss or high-gloss paint that is highly durable and provides a smooth finish.
- Ceiling Paint: Specifically designed for ceilings, offering excellent coverage and splatter resistance.
Benefits of Kitchen Ceiling Paint
- Improved Aesthetics: Transforms dull ceilings into visually appealing focal points.
- Easier Cleaning: Semi-gloss or satin finishes resist dirt and stains, making cleaning a breeze.
- Increased Light Reflection: Light-colored paints reflect light, making the room appear brighter.
- Odor Resistance: Paint designed for kitchens resists cooking odors from lingering.
- Moisture Resistance: Mildew-resistant paints prevent mold and mildew growth in humid environments.
How to Paint a Kitchen Ceiling
- Prepare the Surface: Clean the ceiling and remove all dirt, grease, and cobwebs. Repair any cracks or holes.
- Apply Primer: Apply a coat of ceiling primer to ensure even paint application and improve adhesion.
- Paint the Edges: Use a brush to cut in around the edges of the ceiling, where the ceiling meets the walls.
- Roll the Field: Use a paint roller to apply the paint to the rest of the ceiling in even, overlapping strokes.
- Apply a Second Coat: Once the first coat has dried, apply a second coat for full coverage and a uniform finish.
Beyond its traditional use, kitchen ceiling paint can be used in innovative ways to:
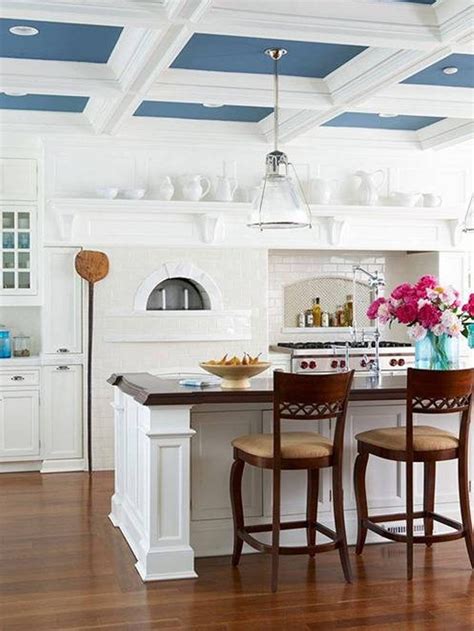
- Create a Feature Ceiling: Paint a bold color or pattern on the ceiling to create a striking visual impact.
- Conceal Structural Imperfections: Use a ceiling-matching paint to camouflage beams, ducts, or other architectural elements.
- Accentuate Moldings: Paint ceiling moldings in a contrasting color to highlight their architectural details.
- Add Texture: Create a textured ceiling by applying a thick coat of paint and using a sponge or brush to add patterns.
| Paint Type | Finish | Durability |
|---|---|---|
| Latex | Semi-gloss, Satin | Good |
| Oil-Based | Semi-gloss, High-Gloss | Excellent |
| Enamel | Semi-gloss, High-Gloss | Excellent |
| Ceiling Paint | Matte, Semi-gloss | Good |
| Color | Benefits |
|---|---|
| White | Timeless, reflects light |
| Gray | Contemporary, complements black and white |
| Beige | Neutral, warm and inviting |
| Light Blue | Calming, airy |
| Preparation Steps |
|—|—|
| Clean the ceiling |
| Remove dirt, grease, cobwebs |
| Repair cracks or holes |
Kitchen ceiling paint is a versatile tool that can elevate your kitchen’s aesthetics and functionality. By choosing the right type and color of paint, and applying it with care, you can create a ceiling that is both beautiful and practical. Whether you’re looking to update your existing ceiling or add a touch of creativity, consider the endless possibilities of kitchen ceiling paint.